There is a specific kind of magic found in the nostalgic flavors of a childhood summer, and these strawberry crunch bars capture that essence perfectly. Imagine the iconic strawberry shortcake ice cream bars from the local truck, but reimagined as a sophisticated, thick, and ultra-creamy no-bake dessert. This recipe isn’t just about flavor; it is a masterclass in textural contrast, featuring a dense golden crust and a neon-pink crumble that shatters with every bite.
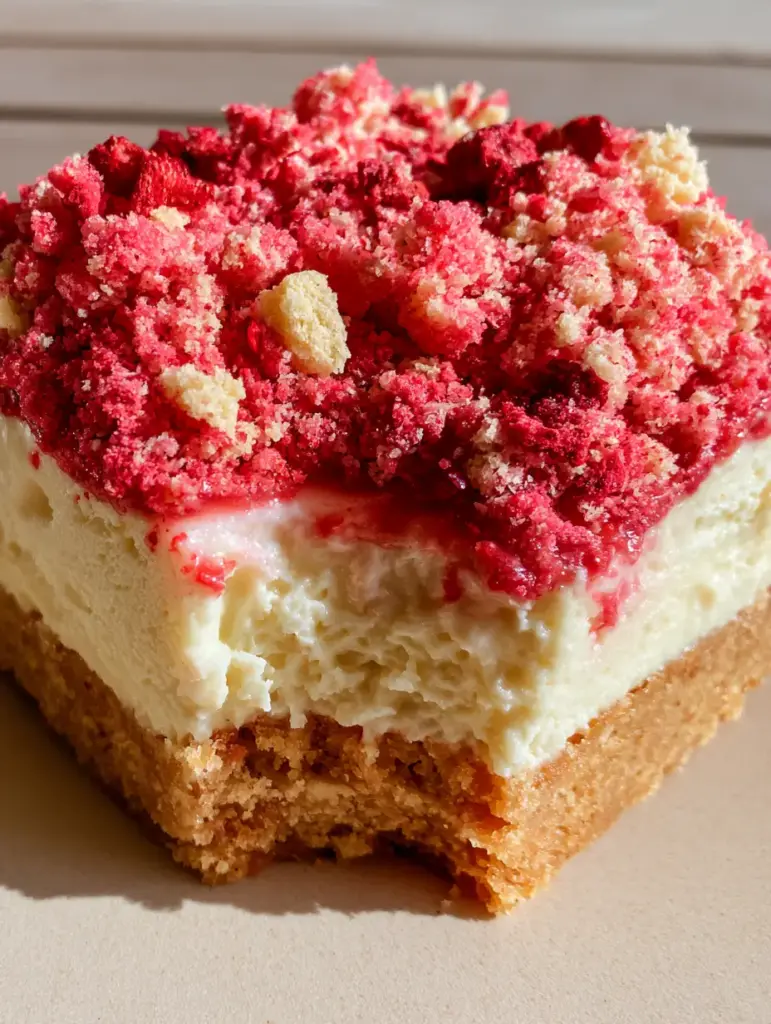
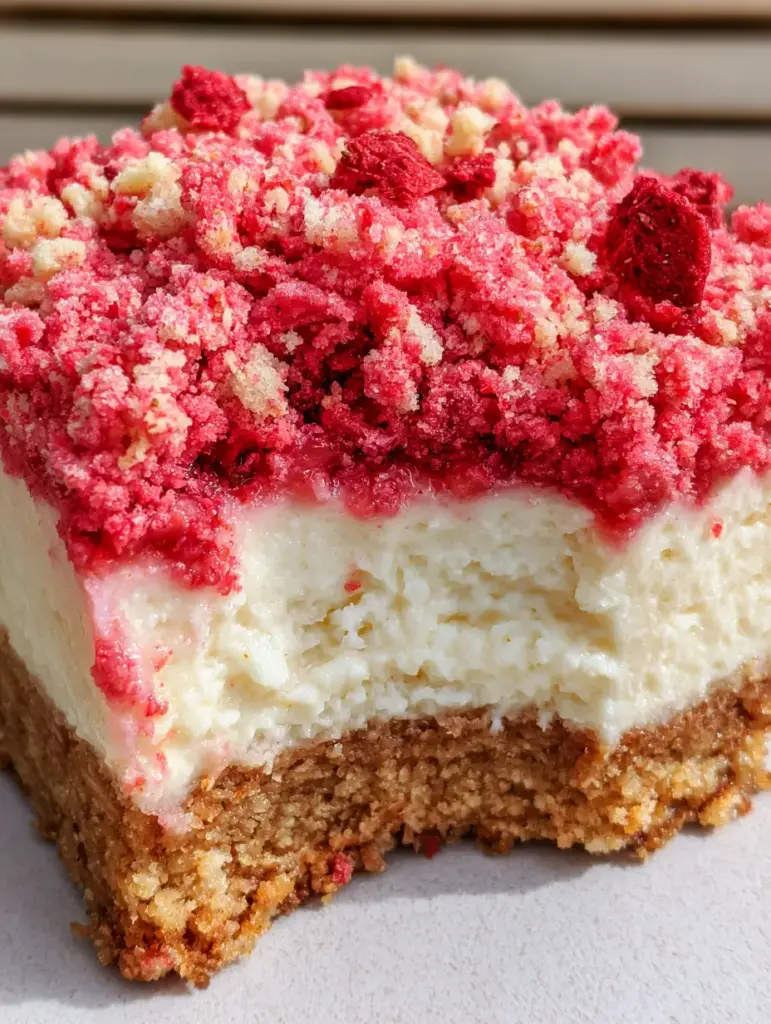
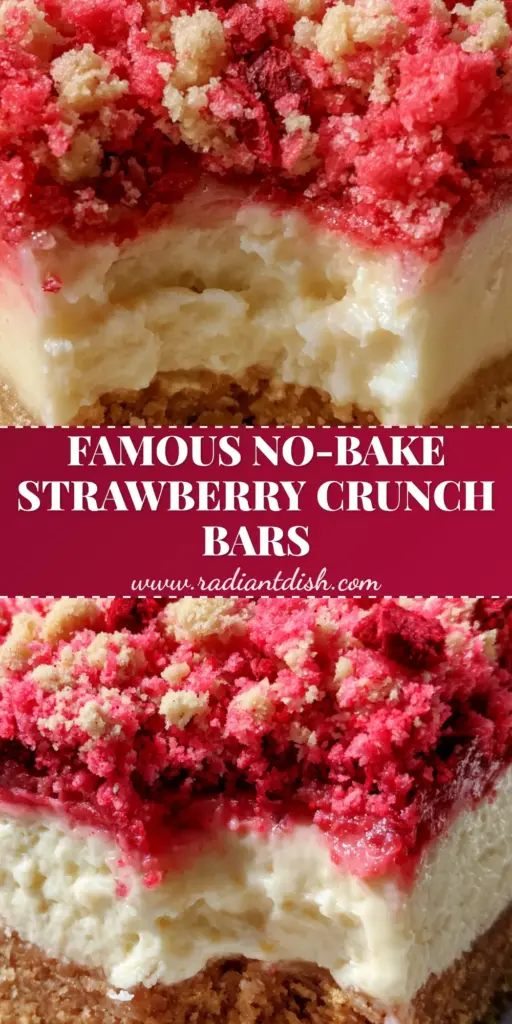
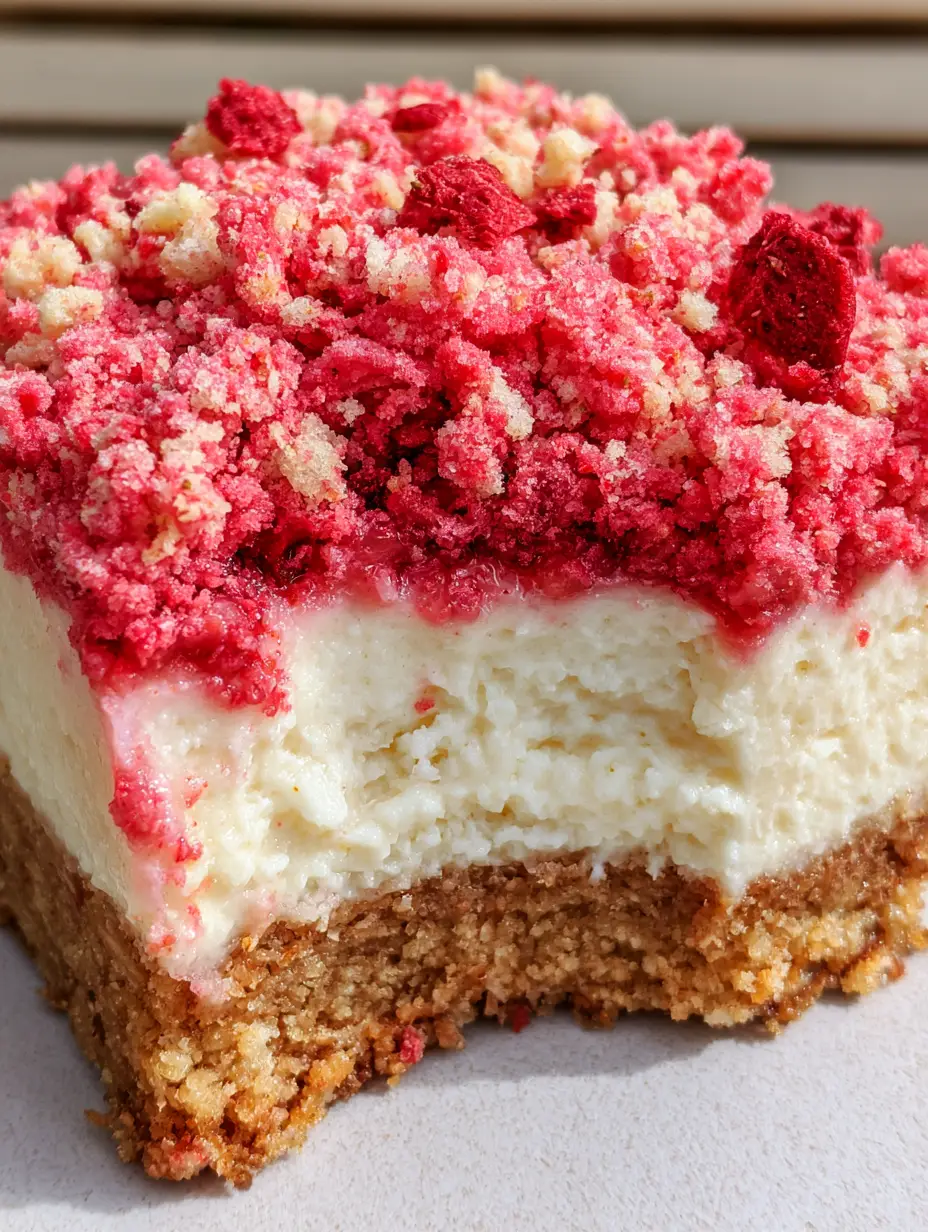
Visually, these bars are a showstopper. The stark white cheesecake layer provides a clean, modern aesthetic that makes the vibrant pink and cream-colored shortcake crumbles pop. Whether you are hosting a backyard picnic or simply looking for a decadent treat to keep in the fridge, these bars deliver a professional-grade result with the approachable ease of a no-bake method.
Why You Will Crave These Thick Strawberry Shortcake Squares
- Unrivaled Textural Harmony: Experience the satisfying snap of a buttery cookie crust followed by the silken “melt-in-your-mouth” feel of vanilla bean cheesecake.
- Vibrant Natural Flavor: We use freeze-dried strawberry bits and premium vanilla bean paste to ensure the flavor is as bold as the neon-pink visual.
- No-Bake Simplicity: Achieve professional bakery-height layers without ever turning on your oven, making this a perfect summer project.
- Picnic-Ready Stability: These bars are engineered to hold their shape, even when served in the soft, natural outdoor daylight of a summer afternoon.
The Anatomy of a Perfect Strawberry Crunch Bar: Essential Ingredients
The Golden Cookie Foundation
Crushed Golden Sandwich Cookies (36 cookies): These provide the structural base. Their sweet, vanilla-forward profile mimics a traditional shortcake better than standard graham crackers.
Melted Salted Butter (1/2 cup / 115g): The “glue” for our crust. Using salted butter balances the high sugar content of the cookies, adding a subtle savory note that invites a second bite.
The Velvety Stark White Filling
Full-Fat Cream Cheese (16 oz / 450g): Ensure this is at room temperature to achieve that “stark white” velvety texture described in our visual blueprint. It provides the necessary tang and body.
Powdered Sugar (1.5 cups / 180g): This sweetens the filling while maintaining a smooth, grit-free mouthfeel. It also acts as a stabilizer for the no-bake structure.
Vanilla Bean Paste (1 tbsp / 15ml): While the filling remains white, the tiny black flecks of real vanilla bean signal high-quality craftsmanship and deep flavor. If you’re looking for more classic inspirations, check out our no-bake orange creamsicle cheesecake.
The Signature Neon-Pink Crunch Topping
Strawberry Gelatin Powder (3 oz / 85g): This is the secret to that “vibrant neon-pink” color. It provides an intense strawberry punch and a nostalgic scent.
Freeze-Dried Strawberry Bits (1/2 cup / 20g): These add a sharp, tart acidity and “bright red” pops of color that contrast beautifully against the cream-colored crumbles.
White Chocolate Crumble Pieces (1/2 cup / 80g): These provide a creamy, rich crunch that mimics the “shortcake” bits found on traditional ice cream bars.
Must-Have Tools for Bakery-Style Results
To achieve the “clean bite” and “minimal plating” height seen in the visual prompt, you will need an 8×8-inch (20x20cm) square baking pan. Lining this with parchment paper with an overhang (slings) is non-negotiable for lifting the bars out cleanly.
A food processor is highly recommended to achieve the “granular” and “ultra-crispy” texture for the topping. If you don’t have one, a heavy rolling pin and a sealed freezer bag will work, though the texture may be slightly more rustic. An offset spatula is also vital for smoothing the cheesecake layer into a perfectly flat, stark white surface.
Step-by-Step Evolution of the Strawberry Crunch Bar
1. Constructing the Dense Golden Base
Pulse the golden sandwich cookies in a food processor until they reach a fine, sandy consistency. Drizzle in the melted salted butter and pulse until the mixture looks like wet sand. Press this firmly into the bottom of your lined pan, using the bottom of a flat measuring cup to ensure a dense, even layer. Chill this in the freezer for 10 minutes to set.
2. Whipping the Stark White Cheesecake Layer
In a large bowl, beat the room-temperature cream cheese until it is completely smooth and free of lumps. Sift in the powdered sugar and add the vanilla bean paste. Beat on medium-high until the mixture is thick and velvety. For extra height, you can fold in a small amount of stiff-peaked whipped cream. Spread this evenly over the chilled crust, using your offset spatula to create a level top.
3. Crafting the Neon-Pink Shortcake Crumble
In a separate bowl, combine crushed golden cookies, strawberry gelatin powder, and melted butter. Toss until the cookies are evenly stained pink. Stir in the white chocolate crumble pieces and the freeze-dried strawberry bits. The result should look messy, crispy, and granular. Sprinkle this generously over the cream cheese layer, pressing down very lightly so it adheres.
4. The Critical Chill Phase
For a “clean bite,” these bars must chill for at least 4 hours, or preferably overnight. This allows the fats in the cream cheese and butter to solidify, creating the structural integrity required for a handheld smartphone photo-worthy slice. Just before serving, add a fresh sliced strawberry garnish to each square for a burst of moisture and color.
Expert Tips for the Ultimate Crunch
- Temperature Control: Never use cold cream cheese. It will result in a lumpy filling rather than the “thick, velvety” layer we are aiming for.
- The Crumble Ratio: If your crumble feels too wet, add more crushed cookies. It should feel like loose granola, not a paste.
- Clean Slicing: Wipe your knife with a warm, damp cloth between every single cut. This ensures the “stark white” middle doesn’t get stained by the pink topping.
- Freeze-Dried vs. Fresh: Keep the fresh strawberry garnish for the very end. Fresh strawberries release moisture which can soften the “ultra-crispy” topping if left too long.
Optimizing Your Dessert Table
These strawberry crunch bars are the ultimate centerpiece for a summer spread. They pair beautifully with other refreshing treats like fresh peach lemonade or a vibrant Hawaiian fruit salad. If you are planning a full outdoor menu, consider serving these after a round of firecracker hot dogs to keep the summer theme consistent.
For those who love a variety of textures at their gatherings, these bars sit well alongside savory bbq side dishes like corn salad or pasta salad. The contrast between a savory meal and this bright, neon-pink dessert is always a crowd-pleaser.
Storage and Freshness Guide
Keep these bars in an airtight container in the refrigerator for up to 5 days. The “crunch” topping is best within the first 48 hours, as the moisture from the cream cheese will eventually begin to soften the cookie bits. For longer storage, these bars freeze exceptionally well. Wrap individual squares in plastic wrap and freeze for up to 3 months. Enjoy them slightly thawed for a texture that mimics a premium ice cream bar.
Frequently Asked Questions
Yes, simply substitute the golden sandwich cookies with your favorite gluten-free vanilla sandwich cookie brand. The measurements and method remain exactly the same.
It is not recommended for the topping itself. Fresh strawberries release moisture which will turn the ‘ultra-crispy’ granular crumble into a soggy paste. Use freeze-dried strawberries for the crunch and fresh slices only as a final garnish.
Use clear vanilla extract or high-quality vanilla bean paste and ensure your cream cheese is at room temperature. Avoid over-beating at high speeds, which can incorporate too much air and yellow the fats; a steady medium-high speed maintains the bright white hue.
This usually happens if the bars haven’t chilled long enough. The butter in the golden crust and the fats in the cream cheese need at least 4 hours to fully set. For the cleanest ‘bite’ and sharpest edges, chill them overnight.
The Ultimate Strawberry Crunch Bar Recipe
Strawberry Crunch Bars with Velvety Cream Cheese Filling
Ingredients
Equipment
Method
- Pulse 36 golden cookies in a food processor until fine. Mix with 1/2 cup (115g) melted butter.
- Press the mixture firmly into a lined 8x8-inch pan. Chill in the freezer for 10 minutes.
- Beat 16 oz (450g) room temperature cream cheese until velvety and stark white.
- Incorporate 1.5 cups (180g) powdered sugar and 1 tbsp (15ml) vanilla bean paste until smooth.
- Spread the filling over the crust using an offset spatula for a level finish.
- Toss crushed cookies with strawberry gelatin and melted butter until neon-pink.
- Fold in white chocolate pieces and freeze-dried strawberry bits for a messy, granular texture.
- Top the bars with the crumble, chill for 4 hours, and garnish with fresh strawberry slices before serving.
Notes
For a crunchier topping, ensure the gelatin is well-incorporated with the butter before adding cookies.
Closing & Call to Action
These strawberry crunch bars are more than just a dessert; they are a nostalgic trip back to summer afternoons, upgraded with professional culinary techniques and high-quality ingredients. The combination of the “stark white” filling and the “neon-pink” topping is guaranteed to make these a favorite in your household. If you enjoyed this recipe, please leave a comment below and share your photos with us! Don’t forget to follow radiantdish on Pinterest for more visually stunning no-bake desserts and summer inspiration.