There is a specific culinary magic that happens when a buttery, toasted flour tortilla meets the cooling crunch of fresh produce and the savory depth of smoked meats. These Cheesy bacon ranch wraps are the physical embodiment of that harmony, offering a multi-textured experience that feels like a gourmet bistro offering right in your own kitchen. Whether you are looking for a high-protein lunch or a satisfying weeknight dinner, this recipe delivers a restaurant-quality result with minimal effort.
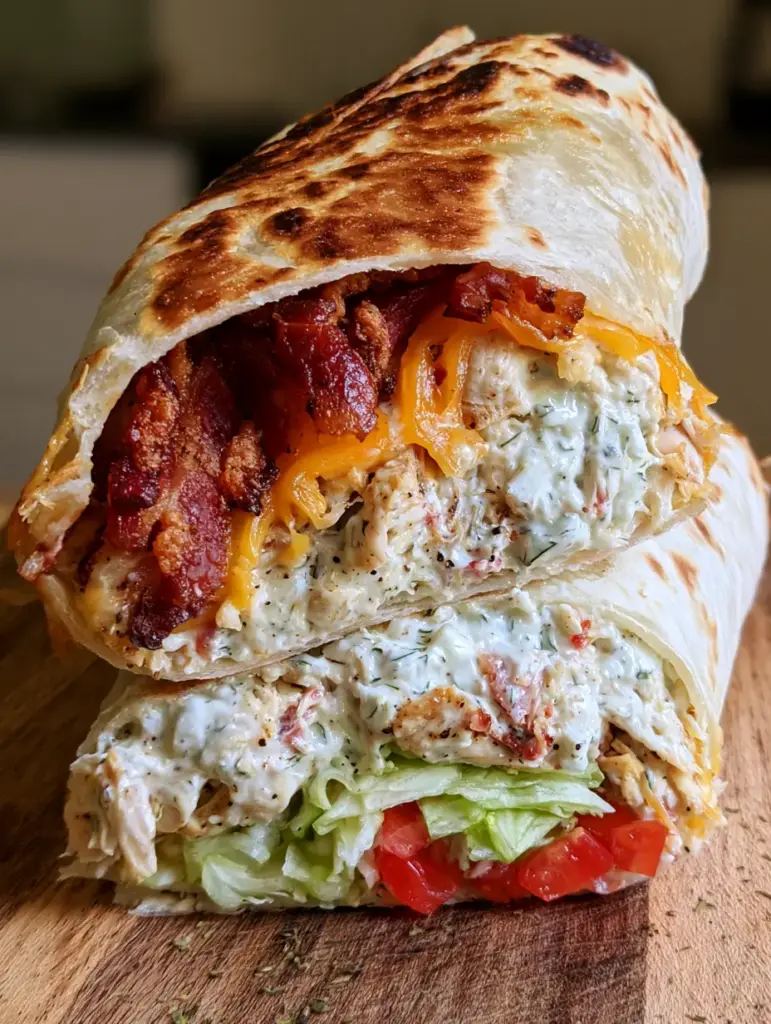
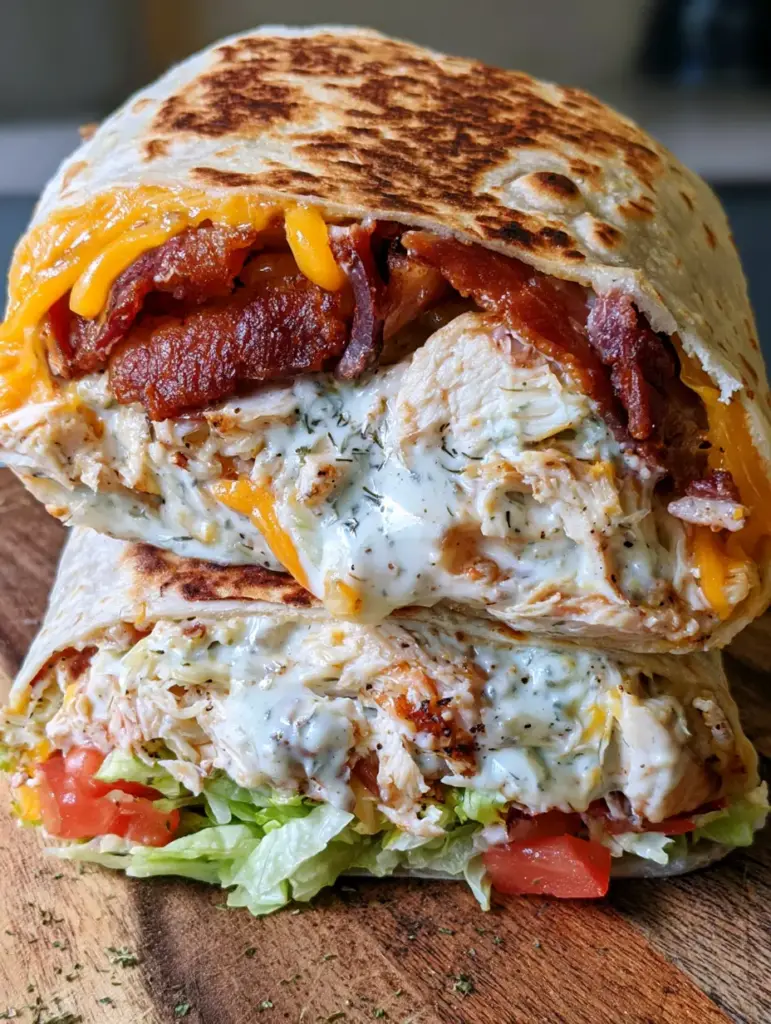
Imagine biting into a shell that has been pan-seared to a perfect golden-brown, revealing a dense, layered interior where molten sharp cheddar binds juicy shredded chicken and thick-cut applewood smoked bacon. The Cheesy bacon ranch wraps are not just about flavor; they are about the architectural integrity of a well-constructed wrap that doesn’t fall apart. By focusing on the science of the sear and the layering of ingredients, we achieve a result that looks exactly like a professional food photograph.
Why You Will Crave These Crispy Ranch Wraps
- The Ultimate Texture Contrast: Experience the transition from a warm, buttery-charred exterior to a cold, crisp iceberg lettuce and tomato center.
- Visual Gourmet Appeal: These wraps feature the iconic “cheese pull” and vibrant red-and-green vegetable layers that make every plate look curated.
- Scientifically Balanced Flavors: The sharp acidity of the vine-ripened tomatoes cuts through the rich, creamy ranch dressing and smoky bacon fat.
- Speed Meets Quality: By utilizing rotisserie chicken, we reduce active cooking time while maintaining a “slow-cooked” tender protein texture.
If you find yourself constantly searching for craveable salty snacks, these wraps provide that savory fix in a much more substantial, meal-sized format. They bridge the gap between a light snack and a heavy entree, making them a versatile addition to your rotation.
The Essential Components for Flavor Dominance
To achieve the specific visual and textural results seen in our blueprint, every ingredient must be selected for its functional role. We aren’t just filling a tortilla; we are building a flavor profile.
Large Flour Tortillas (10-inch): You need a sturdy base that can withstand the moisture of the ranch without tearing. A high-gluten flour tortilla provides the stretch needed for a tight roll and the sugars required for those beautiful golden-brown charred spots.
Shredded Rotisserie Chicken: 2 cups (280g) of hand-shredded breast meat is ideal. Hand-shredding creates more surface area than dicing, allowing the creamy ranch dressing to coat every fiber of the protein for maximum juiciness.
Sharp Orange Cheddar Cheese: 1.5 cups (170g) of freshly grated cheddar is non-negotiable. Pre-shredded cheeses are coated in potato starch to prevent clumping, which inhibits the smooth, stretching melt we want between the layers of chicken and bacon.
Thick-Cut Applewood Smoked Bacon: 6 strips (about 170g) of bacon, fried until deeply browned and crispy. The applewood smoke adds a subtle sweetness that pairs perfectly with the dill flecks in the ranch.
Creamy Ranch Dressing with Dill & Pepper: 1/2 cup (120ml) of high-quality ranch. We enhance this with extra dried dill and cracked black pepper to ensure the “white flecked” visual cues are prominent and the herb profile is front-and-center.
Iceberg Lettuce & Vine-Ripened Tomatoes: 1 cup (70g) shredded lettuce and 2 large tomatoes, diced. These provide the “fresh contrast” layer. Iceberg is chosen specifically for its high water content and structural “snap” that Romaine lacks.
Unsalted Butter: 2 tbsp (30g) for the pan-sear. Butter contains milk solids that caramelize, creating the buttery sheen and charred spots described in our visual blueprint.
Professional Gear for the Perfect Sear
Achieving the visual results of a “buttery sheen” and “diagonal stack” requires the right tools. You don’t need a commercial kitchen, but a few specific items will elevate your Cheesy bacon ranch wraps significantly.
A heavy-bottomed cast iron skillet or a non-stick griddle is essential for even heat distribution. This ensures your tortilla browns uniformly rather than scorching in one spot and remaining raw in others. You will also want a sharp serrated knife to achieve those clean, diagonal slices that reveal the dense interior layers without crushing the lettuce.
If you enjoy the process of preparing high-quality proteins, you might also be interested in our techniques for spicy air-fried chicken or other skewered delights. However, for these wraps, the flat surface of a skillet is your best friend.
Mastering the Culinary Execution: Step-by-Step
1. Preparing the Savory Core
Begin by cooking your thick-cut bacon in a cold skillet, gradually raising the heat to medium. This renders the fat slowly, ensuring the bacon bits are crispy and deeply browned without burning. Once cooled, chop them into generous pieces—we want “bacon bits” that are large enough to be seen and tasted as distinct elements.
In a medium mixing bowl, combine your hand-shredded rotisserie chicken with the creamy ranch dressing, extra dill, and black pepper. Stir until the chicken is fully coated. This “wet” core ensures the wrap remains juicy even after being toasted.
2. The Art of the Layer
Lay your flour tortilla flat on a clean surface. In the center, place a generous layer of shredded sharp cheddar. Top the cheese with the ranch-coated chicken and the crispy bacon pieces. By placing the cheese directly against the tortilla, it acts as a “glue” once melted, holding the protein in place.
Top the protein with a layer of shredded iceberg lettuce and diced vine-ripened tomatoes. Be careful not to overfill; leave about 2 inches (5cm) of space on the sides to allow for a tight fold.
3. Achieving the Golden-Brown Char
Fold the sides of the tortilla inward, then roll from the bottom up, keeping the tension tight. Melt 1 tbsp (15g) of butter in your skillet over medium-high heat. Wait for the butter to foam and then subside—this is the cue that the water has evaporated and the fat is hot enough to sear.
Place the wrap seam-side down in the skillet. Use a spatula to press down gently, ensuring maximum contact with the heat. Sear for 2-3 minutes until you see those iconic golden-brown charred spots. Flip and repeat on the other side until the tortilla has a visible buttery sheen and the cheese inside has turned into molten ribbons.
4. The Final Reveal
Remove the wrap from the heat and let it rest for exactly 60 seconds. This allows the internal temperature to stabilize so the ranch doesn’t run out when sliced. Using a diagonal motion, slice the wrap through the center. Stack the two halves to showcase the dense, colorful layers of orange cheese, green lettuce, and red tomatoes.
Expert Tips for Success
- Cold vs. Hot: Keep your lettuce and tomatoes in the refrigerator until the very last second. The contrast between the hot, seared tortilla and the ice-cold vegetables is a hallmark of a professional wrap.
- Moisture Control: After dicing your tomatoes, let them sit on a paper towel for 5 minutes. This prevents excess juice from making your Cheesy bacon ranch wraps soggy.
- The Tight Roll: If you struggle with the roll, lightly microwave the tortilla for 10 seconds. This relaxes the gluten and makes the flour more pliable, preventing cracking.
- Cheese Selection: If you want an even more dramatic cheese pull, mix your sharp cheddar with a little bit of Monterey Jack.
Storage, Reheating & Meal Prep
These Cheesy bacon ranch wraps are best enjoyed immediately to preserve the texture of the toasted tortilla. However, if you are meal prepping, store the chicken and ranch mixture separately from the dry ingredients. Assemble and sear just before serving.
If you must reheat a fully assembled wrap, avoid the microwave, which will turn the lettuce into a mushy mess. Instead, use a toaster oven or a dry skillet over medium heat to recrisp the exterior while gently warming the interior. These wraps are a fantastic option for late-night cravings because they can be assembled so quickly.
What to Serve With Your Wraps
To turn this into a full feast, consider pairing your wraps with a light, acidic side dish. A fresh corn and avocado salad provides a creamy yet bright accompaniment that complements the ranch flavors.
For those looking for a complete menu for a gathering, these wraps sit perfectly alongside other handheld favorites like honey garlic chicken skewers. The sweetness of the honey-garlic glaze offers a lovely counterpoint to the smoky, savory profile of the bacon and cheddar.
Frequently Asked Questions
It’s best to prep the components (chicken ranch mix, chopped bacon, shredded cheese) and store them separately. Assemble and sear the wrap right before you plan to eat for the best texture.
Yes, flour tortillas are actually preferred for this recipe because they are more pliable and brown better in the skillet, creating those iconic charred spots.
To prevent sogginess, always seed your tomatoes and pat them dry with a paper towel. Additionally, place the cheese and chicken layers against the tortilla to act as a barrier for the fresh vegetables.
Avoid the microwave. Reheat in a dry skillet over medium heat for 2-3 minutes per side, or in an air fryer at 350°F (175°C) for 3-5 minutes to restore the crunch.
Rotisserie chicken is already seasoned and incredibly tender. It saves time and ensures the chicken remains juicy throughout the pan-searing process of the wrap.
The Ultimate Cheesy Bacon Ranch Wrap Recipe
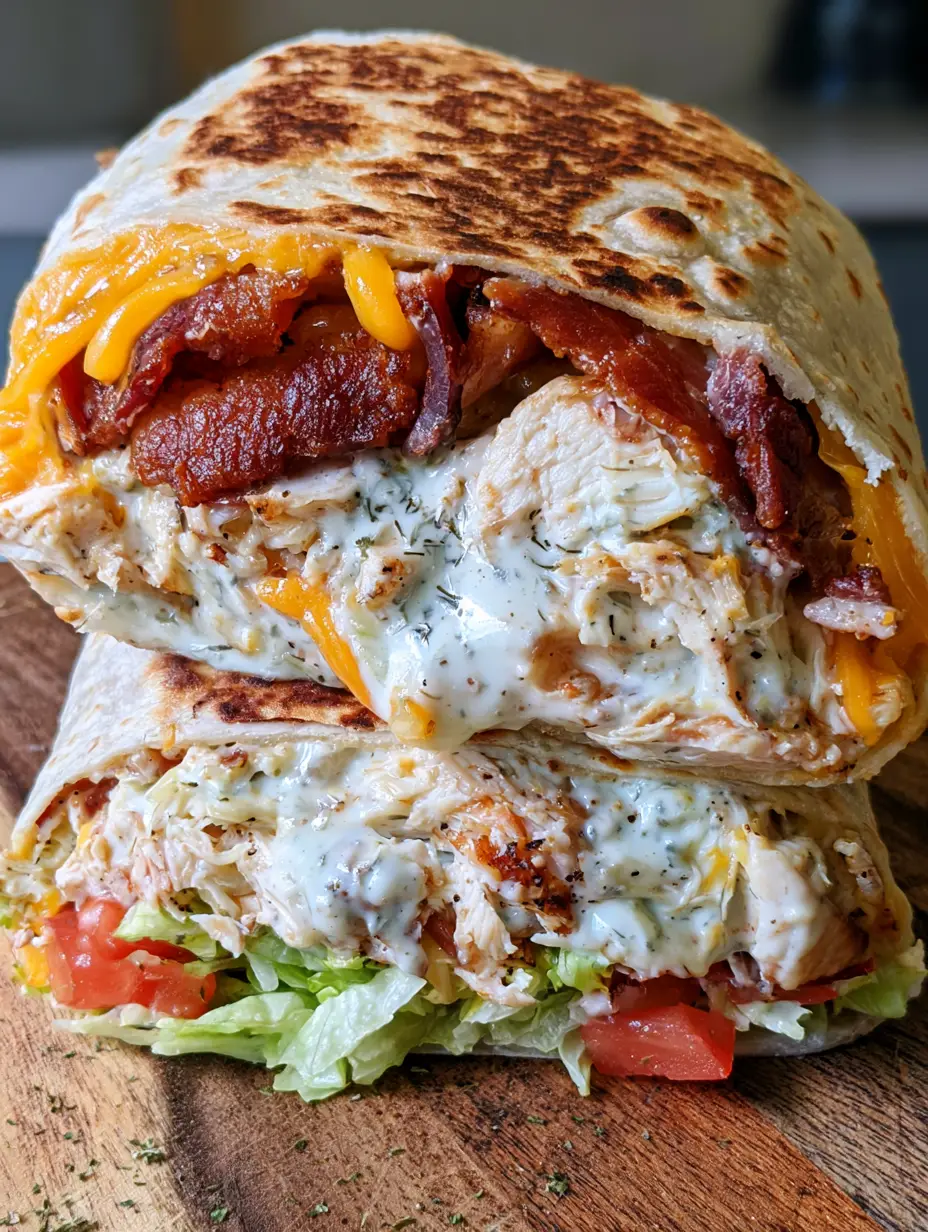
Cheesy Bacon Ranch Wraps with Crispy Chicken and Melted Cheddar
Ingredients
Equipment
Method
- Fry applewood bacon strips until deeply browned and crispy. Drain on paper towels and chop into large bits.
- In a bowl, combine shredded chicken, ranch dressing, dried dill, and black pepper until chicken is thoroughly coated.
- Place tortillas flat. Distribute cheddar cheese, chicken mixture, bacon bits, shredded lettuce, and diced tomatoes in the center of each.
- Fold in the sides and roll tightly from the bottom, ensuring the seam is secure.
- Melt butter in a skillet over medium-high heat. Place wraps seam-side down. Sear for 2-3 minutes until golden-brown charred spots appear and a buttery sheen develops. Flip and sear the other side.
- Let rest for 1 minute. Slice diagonally with a sharp knife and stack to reveal the layered interior.
Notes
Use a serrated knife for the cleanest cross-section slice.

Final Thoughts on This Crispy Favorite
Creating the perfect Cheesy bacon ranch wraps is a lesson in balance. From the smoky crunch of the applewood bacon to the cooling dill of the ranch, every bite offers a different sensory experience. We hope this guide helps you achieve that restaurant-quality toasted finish and the gooey cheese pull that makes this dish so iconic.
If you loved this recipe, please leave a comment below and share your results! For more visually stunning recipe inspiration, be sure to follow us and save this recipe to Pinterest so you never lose track of this weeknight staple.