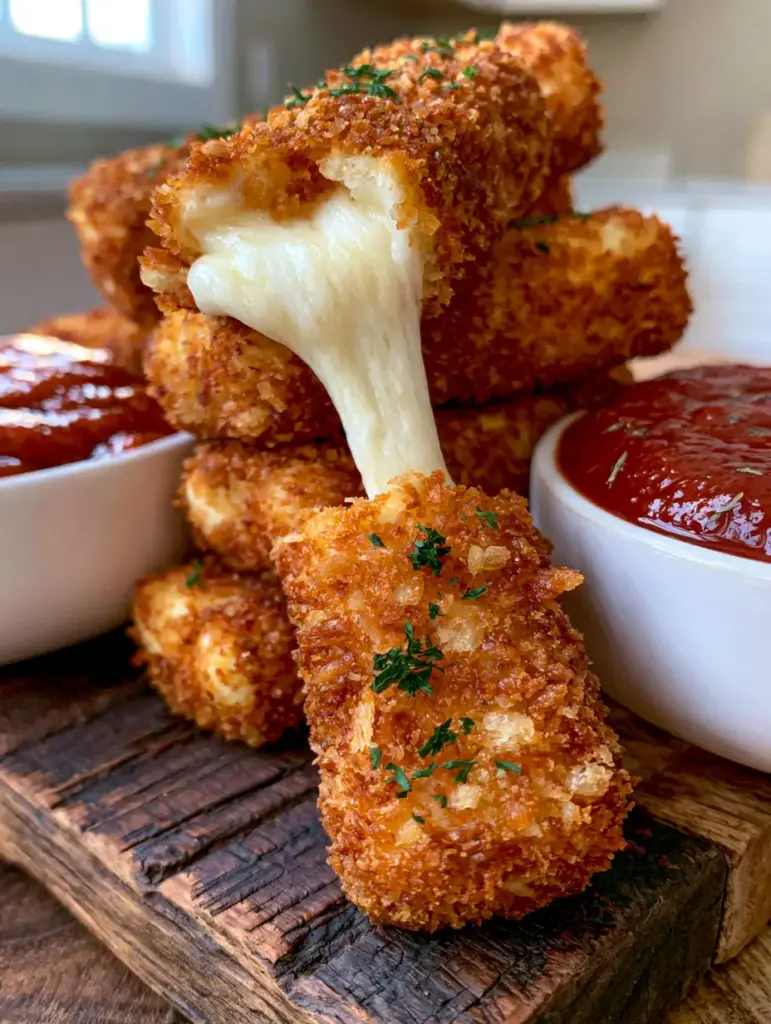
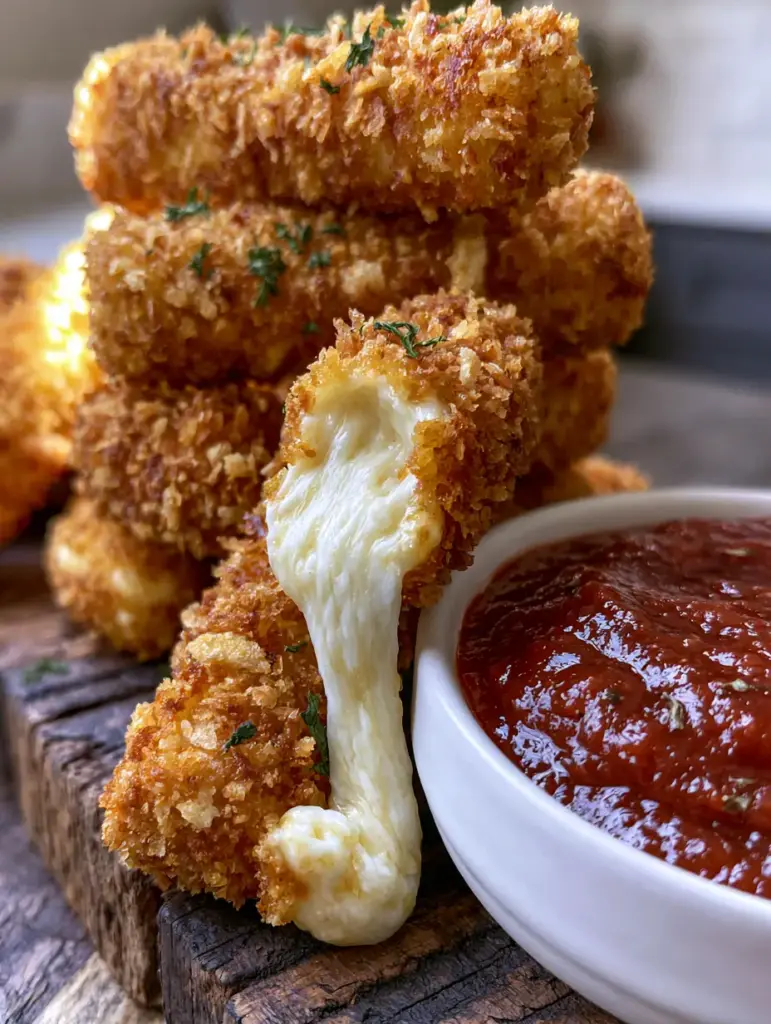
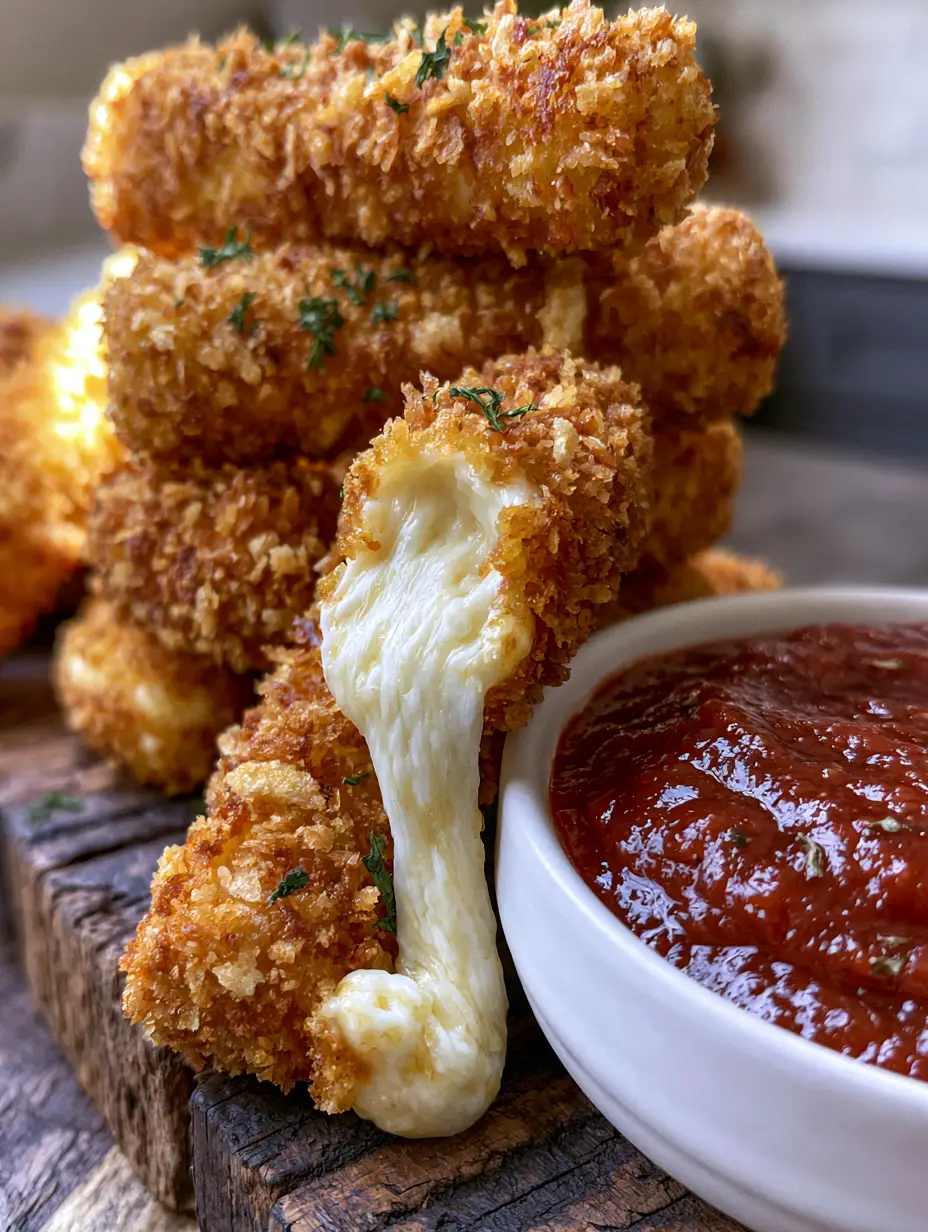
Finding the perfect mozzarella sticks recipe is the holy grail for any home cook who loves a classic tavern-style appetizer. Imagine a stack of golden-brown, craggy-textured sticks resting on a rustic dark wood board, just waiting to be pulled apart. When you break one open, you are greeted by an epic, long, stretchy, gooey melted white cheese pull that reaches out, promising the ultimate sensory satisfaction.
This isn’t just a snack; it’s a masterclass in texture and temperature. By using a double-dredged panko breading technique, we ensure a thick, reinforced wall of crunch that keeps the molten cheese contained until the very first bite. Every stick is finished with a dusting of bright green dried parsley flakes to contrast the deep golden hues of the fried exterior.
Whether you are hosting a game day or looking for the perfect addition to your New Year’s Eve snacks lineup, this recipe delivers professional results. We have engineered every step—from the freezing process to the oil temperature—to ensure your cheese stays inside the breading and stretches for miles. Get ready to dip these crunchy masterpieces into a thick, glossy, deep red marinara sauce for the ultimate bite.
Why This Is the Only Mozzarella Sticks Recipe You’ll Ever Need
- The Craggy Crunch: Our double-dredge method using Japanese panko creates an incredibly textured, ultra-crispy shell that stays crunchy longer than standard breadcrumbs.
- The Professional Cheese Pull: We utilize low-moisture part-skim mozzarella to achieve that iconic, elastic stretch seen in high-end food photography.
- Visual Precision: From the rustic wooden serving board presentation to the vibrant dried parsley garnish, these look exactly like they came from a professional kitchen.
- Science-Backed Technique: We dive into the “Flash Freeze” method, which is the secret to preventing the dreaded “cheese explosion” in the fryer.
The Architectural Components of a Perfect Cheese Stick
The Core: Low-Moisture Mozzarella
The foundation of any great mozzarella sticks recipe is the cheese itself. You want 12 sticks (approx. 340g) of low-moisture, part-skim mozzarella string cheese. This specific type of cheese has a lower water content, which prevents it from becoming watery or leaking through the breading as it melts.
Low-moisture cheese provides the structural integrity needed for that “epic pull.” High-moisture fresh mozzarella (the kind in balls) will simply dissolve and steam inside the breading, leading to a soggy mess. For the best results, keep your cheese sticks chilled until the very second you are ready to dredge them.
The Reinforcement: All-Purpose Flour and Seasonings
You will need 1 cup (125g) of all-purpose flour seasoned with 1 tsp (5g) garlic powder and 1 tsp (5g) onion powder. The flour acts as the primary “glue” for the egg wash. It absorbs the surface moisture of the cheese, creating a dry interface that the liquid can cling to.
Adding aromatics directly to the flour ensures that the flavor is built from the inside out. Don’t skip the seasoning here, as the cheese itself is relatively mild. A pinch of fine sea salt in the flour is essential for enhancing the dairy notes of the mozzarella.
The Binder: Large Eggs and Heavy Cream
For the egg wash, use 3 large eggs beaten with 2 tbsp (30ml) of heavy cream or whole milk. The fat in the cream helps create a richer, more tenacious binder than water alone. This liquid layer is what allows the panko to adhere in a thick, even coat.
This is the “bridge” of our recipe. Without a high-quality egg wash, the panko crumbs will fall off in the fryer, leaving bald spots where the cheese can escape. Ensure your eggs are well-beaten until no streaks of white remain for a smooth coating process.
The Armor: Panko Breadcrumbs and Dried Parsley
The star of the show is 2 cups (120g) of Japanese panko breadcrumbs mixed with 1 tbsp (2g) of dried parsley flakes. Panko crumbs are larger and more jagged than traditional breadcrumbs. This creates more surface area for the oil to hit, resulting in a craggier, crunchier exterior.
The dried parsley isn’t just for flavor; it provides those tiny flecks of bright green that make the golden-brown sticks pop visually. If you want a bit of heat, you can also add a pinch of red pepper flakes to this mixture. This layer is what gives us that “extremely textured” look described in the visual blueprint.
Essential Tools for Deep-Fried Success
To achieve the results of this mozzarella sticks recipe, you need the right gear. A heavy-bottomed Dutch oven or a deep cast-iron skillet is ideal for maintaining a consistent oil temperature. Rapid temperature drops are the enemy of a crispy crust, so choose a vessel that holds heat well.
An instant-read thermometer or a candy thermometer is non-negotiable. You must hit exactly 350°F (175°C) to sear the crust instantly. If the oil is too cold, the sticks will soak up grease; if it’s too hot, the panko will burn before the cheese melts.
Lastly, ensure you have a rustic dark wood serving board for that final presentation. Serving these on wood helps absorb any residual steam, keeping the bottom of the sticks just as crunchy as the top. Pair this setup with a small white ceramic bowl for your marinara to create that high-contrast, professional look.
Step-by-Step Instructions: The Double-Dredge Method
Step 1: The First Coating (The Foundation)
Start by setting up your dredging station: one bowl for the seasoned flour, one for the egg wash, and one for the panko-parsley mix. Take each chilled mozzarella stick and roll it in the flour, shaking off the excess. You want a thin, invisible layer that feels like velvet to the touch.
Dip the floured stick into the egg wash, ensuring it is completely submerged. Lift it out and let the excess drip off. If the egg wash doesn’t cover every millimeter, the panko won’t stick, and your mozzarella sticks recipe will fail at the first hurdle. Consistency is key here.
Step 2: The First Panko Pass
Drop the egg-coated stick into the panko mixture. Use your dry hand to press the crumbs firmly onto the cheese. At this stage, you will see the shape of the stick start to transform. It will look breaded, but you’ll likely still see some of the white cheese peeking through the crags.
Place the breaded sticks on a parchment-lined baking sheet. This first layer provides the base texture, but it isn’t enough to withstand the pressure of melting cheese. We need to go back in for a second pass to create that “double-dredged” armor mentioned in our visual blueprint.
Step 3: The Second Dredge (The Armor)
Now, repeat the process: dip the already-panko-coated stick back into the egg wash, then back into the panko. This second layer fills in the gaps and creates a thick, craggy crust. By the end of this step, the sticks should look significantly larger and very textured.
This double-dredging technique is what separates amateur recipes from the ultimate mozzarella sticks recipe. It creates a structural cage that allows the cheese to become completely molten without breaking through the crust. Press the panko on firmly one last time to ensure a tight bond.
Step 4: The Critical Flash Freeze
Place the tray of breaded sticks in the freezer for at least 2 hours, or until frozen solid. Do not skip this! Freezing the cheese ensures that the exterior panko has enough time to turn golden and crispy in the oil before the cheese inside gets too hot and expands.
If you fry them at room temperature, the cheese will melt and leak out within 30 seconds. A frozen core is the secret to that “epic, long, stretchy, gooey melted white cheese pull.” This thermal lag is the culinary science that makes this recipe work perfectly every time.
Step 5: Frying to Golden Perfection
Heat 3 cups (720ml) of neutral oil (like canola or vegetable oil) to 350°F (175°C) in your heavy pot. Carefully lower 3-4 frozen sticks into the oil at a time. Do not overcrowd the pan, as this will drop the oil temperature and lead to greasy sticks.
Fry for 1.5 to 2 minutes, turning occasionally with a slotted spoon. Look for specific sensory cues: the panko should be a deep golden-brown, and you might see the tiniest hint of cheese just starting to bulge against the crust. Remove them immediately and drain on a wire rack—not paper towels, which can cause steaming and sogginess.
Expert Tips for the Most Realistic Results
- Temperature Precision: Use a thermometer to keep your oil at 350°F (175°C). If it drops below 325°F (160°C), the breading will absorb oil and become heavy.
- The “Dry Hand/Wet Hand” Rule: Use your left hand for liquid (egg wash) and your right hand for dry (flour and panko). This prevents your fingers from becoming breaded clubs during the process.
- Don’t Over-Fry: Once the sticks hit that golden-brown hue, they are done. Every second longer increases the internal pressure of the cheese, risking a blowout.
- Resting Period: Let the sticks rest for 60 seconds after frying. This allows the internal heat to distribute evenly, ensuring the cheese is perfectly gooey without being scalding liquid.
How to Store and Reheat Your Mozzarella Sticks
If you have leftovers, store them in an airtight container in the refrigerator for up to 3 days. However, for the best experience, we recommend freezing the raw breaded sticks and only frying what you need. These are significantly better when cooked fresh from the freezer.
To reheat, avoid the microwave at all costs! It will turn the panko into a soggy sponge. Instead, use an air fryer at 375°F (190°C) for 3-5 minutes, or a toaster oven until the exterior crisps back up. This preserves the “craggy, crunchy panko crumbs” we worked so hard to create.
Perfect Pairings: What to Serve with Mozzarella Sticks
A mozzarella sticks recipe is only as good as its dipping sauce. Traditionally, a thick, glossy, deep red marinara sauce is the gold standard. The acidity of the tomatoes cuts through the richness of the fried cheese and panko breading perfectly.
If you’re building a full appetizer spread, these pair beautifully with other finger foods. Consider serving them alongside pizza chips or perhaps some cucumber sandwiches for a lighter contrast. For a more substantial snack board, adding cut watermelon sticks provides a refreshing palate cleanser between the savory, cheesy bites.
If you want to keep the theme of crispy coatings going, these sticks are a natural companion to a coconut chicken recipe. The sweet and savory contrast between the coconut and the salty mozzarella is a crowd-pleaser for any gathering.
Frequently Asked Questions
Yes! Spray the frozen breaded sticks generously with oil and air fry at 400°F (200°C) for 6-8 minutes, turning halfway through. Note that deep frying provides the most consistent golden-brown color.
You can keep them in a sealed freezer bag for up to 2 months. They are actually a great ‘make-ahead’ snack that you can fry directly from frozen whenever the craving hits.
Low-moisture, part-skim mozzarella string cheese is the gold standard. Its protein structure is aligned for stretching, and the lower water content prevents the crust from getting soggy.
Explosions happen when the cheese melts and expands before the crust is fully set. To prevent this, you must double-dredge for a thicker shell and freeze the sticks for at least 2 hours before frying.
Panko breadcrumbs are larger and dryer, which creates a lighter, airier, and crunchier texture (the ‘craggy’ look). Regular breadcrumbs tend to absorb more oil and can become dense.
The Ultimate Mozzarella Sticks Recipe Card
Mozzarella Sticks Recipe: The Ultimate Crispy Panko Crust and Stretchy Cheese Pull
Ingredients
Equipment
Method
- Arrange three bowls: one with seasoned flour, one with beaten eggs and cream, and one with panko and parsley.
- Coat cheese in flour, then egg, then panko. Repeat the egg and panko dip once more for a thick, craggy crust.
- Place breaded sticks on a tray and freeze for at least 2 hours. This prevents the cheese from leaking during frying.
- Heat oil to 350°F (175°C). Fry sticks in batches for 1.5-2 minutes until golden-brown and textured.
Notes
Tip 2: Use a thermometer to keep oil at exactly 350°F.
Final Thoughts: Master the Pull
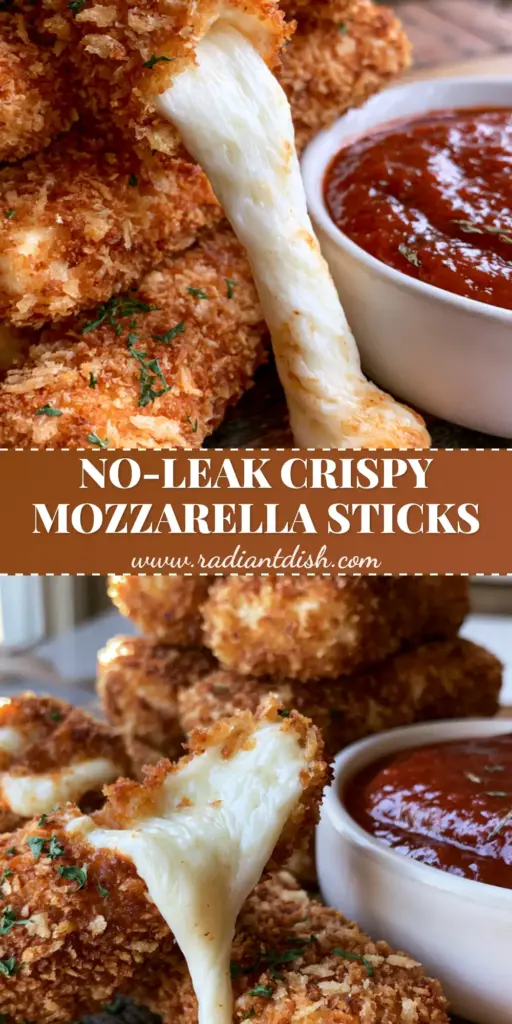
Making a restaurant-quality mozzarella sticks recipe at home is all about respecting the process. From the double-dredge to the essential flash-freeze, every step serves a purpose in creating that “epic cheese pull” and “golden-brown” crunch. Your friends and family will be amazed at the professional texture and flavor you’ve achieved.
We would love to see your results! If you make this recipe, please leave a comment below and tell us how your cheese pull turned out. Don’t forget to share your photos and follow us on Pinterest for more culinary inspiration and visual recipe blueprints.