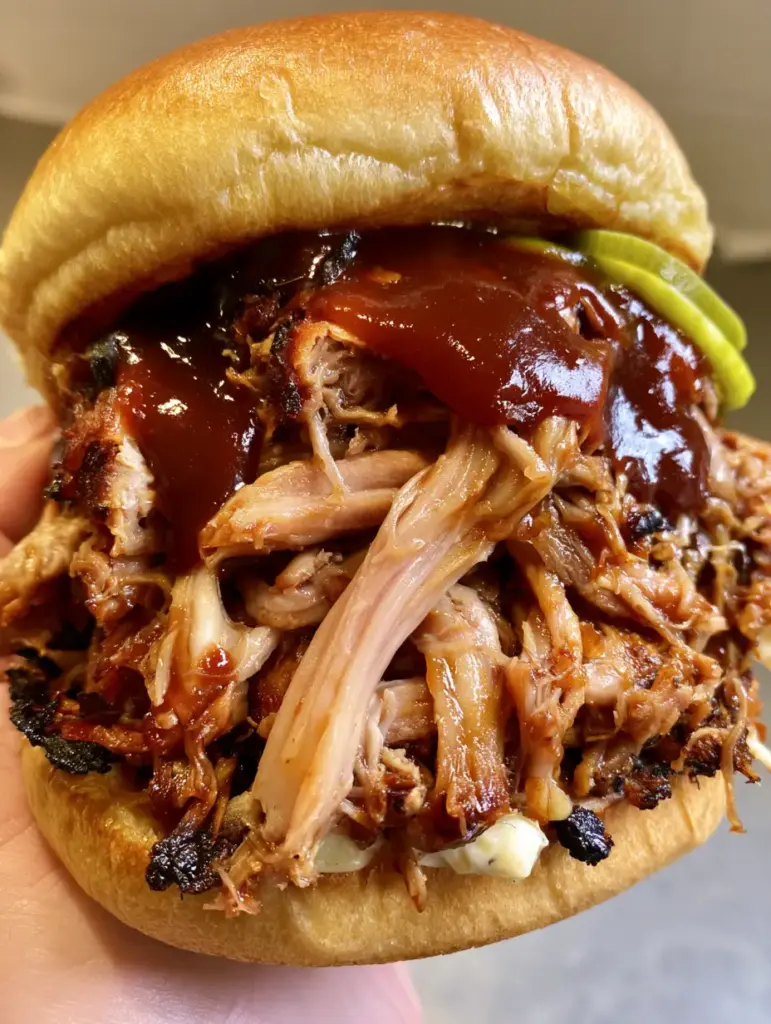
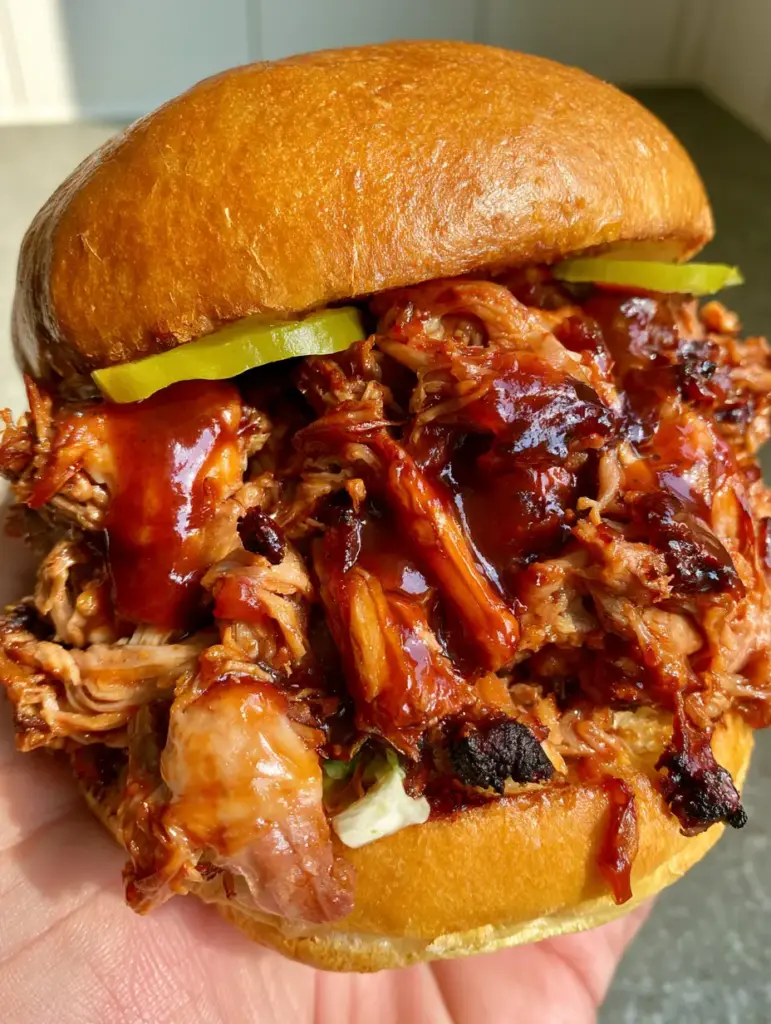
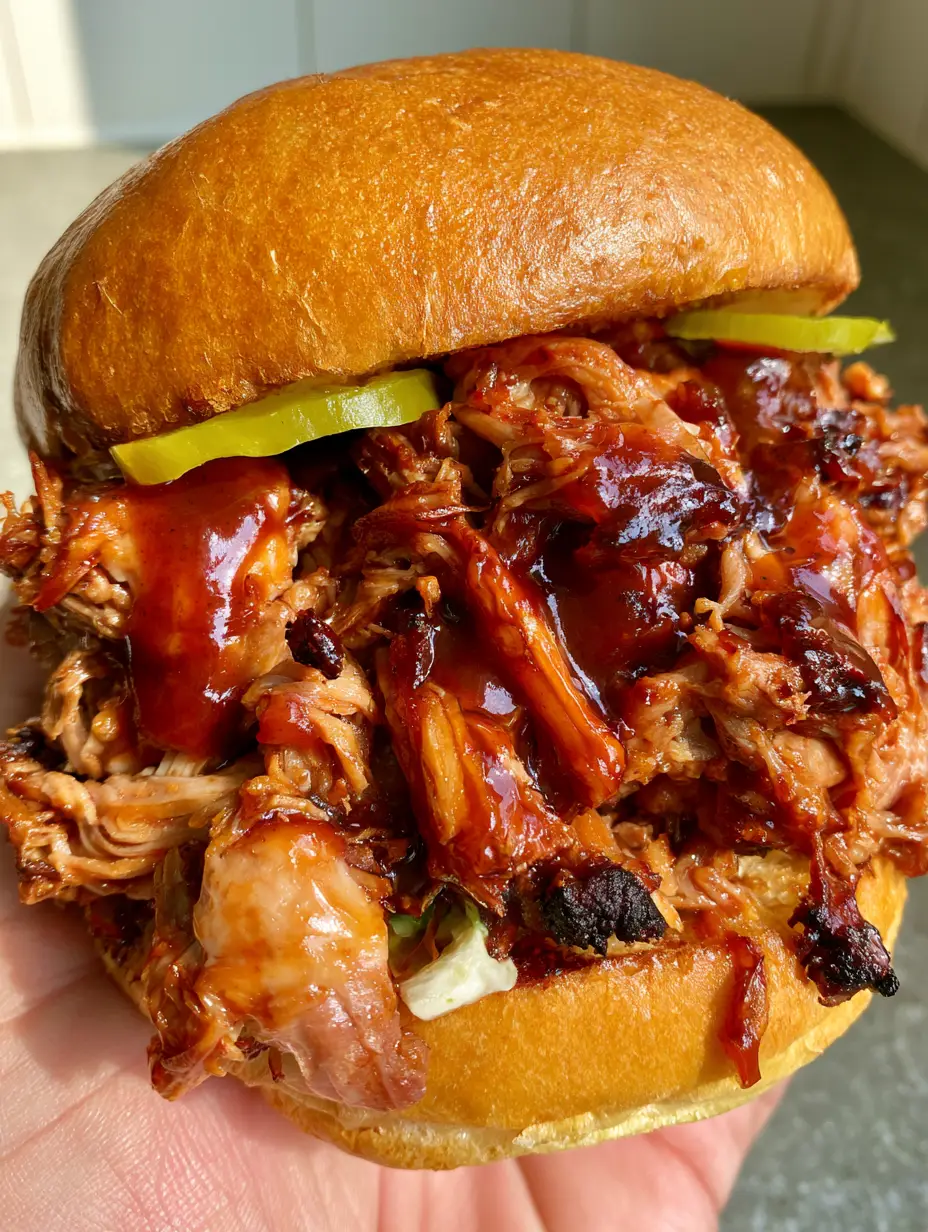
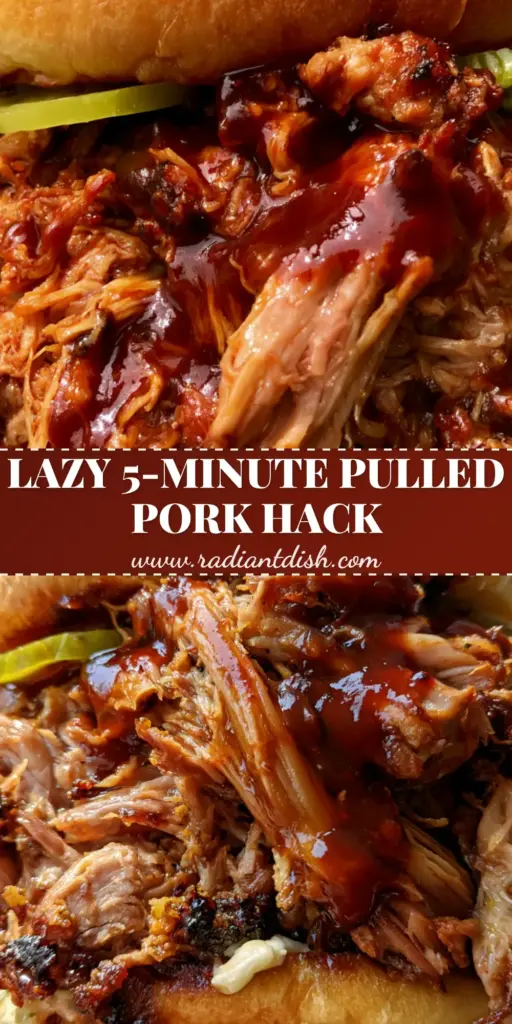
There is nothing quite like the sight of slow cooker bbq pulled pork sandwiches piled high on a buttery bun, with tender fibers of meat glistening under a thick, dark mahogany sauce. When you hold that first sandwich in your hand, feeling the weight of the succulent pork and seeing those charred bits of bark peeking through, you know you’ve hit the BBQ jackpot.
The secret to achieving that professional, “ultimate texture” lies in the marriage of a long, slow braise and a strategic high-heat finish. By using a Dr Pepper reduction, we create a glossy, deeply caramelized glaze that clings to every strand of meat, ensuring every bite is as photogenic as it is delicious.
In this guide, we aren’t just throwing meat in a pot; we are building layers of flavor. From the creamy crunch of the coleslaw peeking out from the bottom to the bright snap of bread-and-butter pickles, this recipe is designed for the enthusiastic home cook who wants restaurant-quality results at home.
Why This Dr Pepper Pulled Pork Recipe Works
- The Ultimate Texture: We achieve long, tender, glistening fibers by choosing the right cut of meat and cooking it at a precise temperature to break down connective tissue without drying it out.
- The Glossy Mahogany Glaze: The inclusion of Dr Pepper provides unique spices and sugars that, when reduced, create a thick, dark sauce that outshines any store-bought version.
- Charred Pork Bark: A quick blast under the broiler after shredding creates those essential “bark bits” that provide a smoky, crispy contrast to the tender meat.
- Balanced Flavor Profile: The sweetness of the BBQ sauce is perfectly offset by the acidity of bread-and-butter pickles and the cool, creamy cabbage coleslaw.
The Foundation: Choosing Your Ingredients Wisely
To recreate the visual masterpiece of these slow cooker bbq pulled pork sandwiches, every ingredient must serve a structural and flavor-focused purpose. Quality matters when you’re aiming for that “ultimate” sandwich height.
4 lbs (1.8kg) Pork Shoulder (Pork Butt): This is the gold standard for pulling. The high fat content and intramuscular marbling melt away during the slow cook, basting the meat from the inside out to ensure it never becomes tough.
12 oz (355ml) Dr Pepper: This isn’t just a gimmick. The carbonation helps tenderize the protein, while the 23 flavors in the soda add a complex, dark base that complements the smoky notes of the BBQ sauce.
1.5 cups (350ml) High-Quality BBQ Sauce: Choose a tomato-based sauce that is slightly smoky. This acts as the vehicle for our mahogany glaze, thickening as it melds with the pork juices.
2 tbsp (30ml) Apple Cider Vinegar: This “invisible” ingredient provides the necessary acidity to cut through the richness of the pork fat and the sweetness of the soda reduction.
6 Brioche Buns: These must be toasted with butter. The high egg and butter content in brioche allows the bun to hold up against the “dripping” sauce without becoming soggy.
1 cup (150g) Creamy Cabbage Coleslaw: A simple mix of shredded cabbage and a high-fat mayo dressing. It provides the “creamy white” visual contrast and a cooling crunch.
12-18 Slices Bread-and-Butter Pickles: These provide a bright green pop of color and a sweet-tart crunch that is essential for cutting through the savory “umami” of the meat.
Foundational Seasonings: You will need 1 tbsp (15g) Kosher salt, 1 tsp (5g) cracked black pepper, 1 tbsp (15g) smoked paprika, and 1 tbsp (15g) brown sugar to create the initial dry rub. This ensures the flavor is baked into the meat, not just sitting on top.
Essential Equipment for BBQ Success
To achieve the “shredded into long fibers” look seen in our visual blueprint, you need a few specific tools. While the slow cooker does the heavy lifting, the finishing tools are what create the “bark.”
A 6-quart (5.7L) slow cooker is the ideal size for a 4lb roast, allowing for even heat distribution. You will also need a large rimmed baking sheet for the broiling step—this is non-negotiable if you want those charred pork bark bits.
For shredding, two large forks work well, but meat claws can help you achieve those specific “long, glistening fibers” more efficiently. Finally, a small saucepan is required to reduce the cooking liquid into that thick, glossy sauce.
Step-by-Step Instructions for the Perfect Pull
1. Preparing the Pork for Maximum Flavor
Pat the pork shoulder dry with paper towels. A dry surface is essential for the seasonings to adhere and to prevent the meat from “steaming” initially. In a small bowl, combine your salt, pepper, smoked paprika, and brown sugar.
Rub the spice mixture over all sides of the pork, pressing it into the crevices. If you have time, let the seasoned meat sit for 30 minutes at room temperature; this helps the salt penetrate the fibers for a deeper seasoning.
2. The Low and Slow Braise
Place the seasoned pork into the slow cooker. Pour the 12 oz (355ml) of Dr Pepper around the base of the meat, not directly over the top, to avoid washing off your spice rub. Cover and cook on LOW for 8-9 hours.
Visual Cue: You know the pork is ready when a fork inserted into the center can be twisted with zero resistance. The meat should be practically falling away from the bone (if using bone-in).
3. Shredding and Creating the “Bark”
Carefully remove the pork from the slow cooker and place it on a large baking sheet. Do not discard the liquid! Shred the pork into long, thick strands. Avoid over-shredding into a “mush”; you want those distinct fibers visible in the sandwich.
Spread the shredded pork in an even layer on the baking sheet. Drizzle with 1/2 cup (120ml) of the cooking liquid and place under the broiler for 5-7 minutes. Watch for the edges to turn dark brown and crispy—these are your charred bark bits.
4. Reducing the Mahogany Sauce
While the pork broils, strain the remaining liquid from the slow cooker into a saucepan. Add the BBQ sauce and apple cider vinegar. Bring to a boil, then simmer over medium-high heat for 10-15 minutes.
Sensory Cue: The sauce is ready when it has reduced by half and coats the back of a spoon. It should look dark, mahogany, and incredibly glossy. The smell will be a heady mix of caramelized sugar and woodsmoke.
5. The Final Toss and Assembly
Transfer the charred pork back into a bowl and pour the reduced sauce over it. Toss gently to ensure every fiber is glistening and “dripping” with sauce. Toast your brioche buns with a generous smear of butter until the edges are golden brown.
To assemble, place a spoonful of creamy coleslaw on the bottom bun. Pile the pork high—higher than you think! Top with 3 slices of bread-and-butter pickles and the top bun. Serve immediately while the sauce is still warm and glistening.
Expert Tips for the Ultimate Pulled Pork
- Don’t Rush the Cook: Always use the “Low” setting. High heat can cause the muscle fibers to seize and toughen before the collagen has a chance to melt.
- The Fat Cap Secret: If your pork shoulder has a thick layer of fat on one side, cook it with the fat side up. As it melts, it will naturally baste the meat below.
- The Sauce Reduction: If your sauce isn’t thickening enough, whisk in a small cornstarch slurry (1 tsp cornstarch mixed with 1 tsp cold water) to reach that “glistering” consistency.
- Toast the Buns: A non-toasted bun will disintegrate within minutes. The buttered, toasted surface acts as a moisture barrier against the BBQ sauce.
Storage, Reheating, and Freezing
Leftover pulled pork is often better the next day as the flavors continue to meld. Store the meat in an airtight container in the refrigerator for up to 4 days. When reheating, add a splash of water or extra Dr Pepper to maintain the moisture.
To freeze, let the meat cool completely and store in a freezer-safe bag for up to 3 months. For the best texture, thaw overnight in the fridge before reheating slowly on the stovetop or in a 300°F (150°C) oven.
Perfect Pairings for Your BBQ Feast
These slow cooker bbq pulled pork sandwiches are a meal in themselves, but they shine even brighter with the right accompaniments. To round out the plate, consider serving them alongside classic homemade french fries (coming soon) or a tangy potato salad.
If you’re looking for more slow-cooked comfort, our hearty beef stew (coming soon) offers a similar “set-it-and-forget-it” ease. For those who love a bit of heat, try adding some jalapeños to your coleslaw or checking out our spicy ribs recipe (coming soon) for your next cookout.
Frequently Asked Questions
Yes, you can substitute root beer, Coca-Cola, or even apple juice, though Dr Pepper provides a unique spiced depth that is signature to this mahogany glaze.
After shredding the meat, spread it on a baking sheet and broil it for 5-7 minutes. This mimics the crispy, smoky exterior found in traditional BBQ pits.
Always butter and toast your buns until golden. The toasted layer creates a barrier, and placing the coleslaw on the bottom protects the bun from the meat’s juices.
Pork shoulder (also known as pork butt) is the best cut because its high fat and collagen content break down during the long cook, resulting in tender, moist fibers.
If the pork is tough, it usually needs more time. Connective tissue melts at a specific temperature; if the roast is particularly large, it may need an extra hour on LOW.
The Ultimate Slow Cooker BBQ Pulled Pork Recipe
Slow Cooker BBQ Pulled Pork Sandwiches with Dr Pepper Glaze
Ingredients
Equipment
Method
- Rub the pork shoulder with salt, pepper, paprika, and brown sugar on all sides.
- Place pork in the slow cooker and pour Dr Pepper around the sides. Cook on LOW for 8-9 hours until tender.
- Remove meat and shred into long fibers. Spread on a baking sheet, drizzle with some liquid, and broil for 5-7 minutes until charred bits form.
- Simmer the cooking liquid with BBQ sauce and vinegar in a saucepan until thick, mahogany, and glossy.
- Toss pork with sauce. Pile high on toasted buns with coleslaw on the bottom and pickles on top.
Notes
Toasting the brioche bun is critical to prevent a soggy sandwich.
Join the Radiant Dish Community!
We hope these slow cooker bbq pulled pork sandwiches become a staple in your home kitchen. There is nothing more rewarding than seeing your family’s faces when you present a tray of these glistening, sauce-dripping masterpieces. The combination of the Dr Pepper glaze and those charred bark bits truly sets this recipe apart.
If you enjoyed this recipe, please leave a comment below and let us know how yours turned out! Don’t forget to sign up for our newsletter to get elite recipes delivered straight to your inbox. You can also follow us and share your creations on Pinterest to help other home cooks find the “ultimate” BBQ experience.